Ever stared at a complex project and yearned for a beacon of organization to cut through the fog of tasks? Excel, the quintessential tool lurking in our office software, offers just that with its powerful timeline capabilities. Laying out a labyrinthine project into a clear, visual map not only helps in understanding the journey ahead but also keeps you on the straight and narrow path to completion.
Navigating project management waters without a sturdy vessel like Excel can lead to choppy seas and unforeseen time crunches. As an ally in efficiency, Excel templates catapult you over the mundane setup tasks, gifting you with more hours to plot your project’s course. Consistency, collaboration, and customization become your loyal crewmates as you chart your way through project milestones and deadlines.
In this article, we’ll embark on a voyage through the creation of a project timeline using Excel and its trusty template sidekicks. Prepare to sail from the safe harbor of spreadsheet setup, past the buoys of basic and advanced functions, and onward to the uncharted waters of best project management practices. Ready your charts—it’s time to set course to a streamlined land of project timelines.
Why Use Excel for Project Timelines
Creating a project timeline in Excel provides a visual representation of project progress, helping project managers and teams stay on track. Excel’s timeline templates can simplify the process, offering a range of layout options to cater to different project scopes and complexities. With Excel, users can easily customize timelines by adding a list of tasks, critical milestones, and key deadlines using the intuitive drop-down menu functionality.
Using a bar chart format, project timelines in Excel can exhibit the duration and overlap of tasks, enhancing the understanding of the project sequence. Formatting tools like the ‘Format Axis’ allow for further refinement of the timeline graphics, ensuring both detailed and high-level project timelines are clear and actionable.
Excel empowers users to build timelines from scratch or leverage premade timeline templates, aiding in the development of everything from basic to complex timelines. Whether for a simple project timeline – showcasing just key milestones – or a more detailed timeline including every task, Excel offers flexibility without the need for specialized project management software.
Excel timelines can evolve into a beautiful and functional display of a project’s lifecycle, crucial for keeping the entire project team aligned with the milestones that drive project success.
Benefits of Using Templates
Project timeline templates in Excel offer various advantages, streamlining the process of crafting a timeline to meet the needs of any project. By leveraging these templates, project managers are empowered with tools to more efficiently coordinate the numerous tasks and milestones.
Time-Saving
Utilizing project timeline templates in Excel is a significant time-saver for project managers and teams. Templates eliminate the need to create a timeline from scratch, providing a foundational structure that only requires inputting specific project details. This allows the project team to focus more on planning and less on designing, as elements such as timeline layout, graphics, and the order of tasks are predefined, enabling a quick start to project planning.
Consistency and Professionalism
Employing timeline templates ensures a consistent format across various projects within an organization, leading to a more unified and professional appearance. Consistency extends to project reports and updates, which are simpler for stakeholders to understand and compare when the same structured format is maintained. Professional-looking timelines also convey the team’s dedication to organization and clarity to clients and company executives, contributing to a positive and competent image.
Easy Collaboration
Working with Excel templates for project timelines facilitates easier collaboration among team members. Excel files are effortlessly shareable, allowing multiple users to view, edit, and update the timeline in real-time. This shared access also promotes transparency in the project’s progress and allows the project team to track changes or updates instantaneously, ensuring that everyone is on the same page and reducing the risk of miscommunication.
Customization Options
While templates offer a ready-made format, Excel still provides ample customization options to tailor the template to specific project requirements. Users can adjust timeline charts, modify bar chart colors, add or remove tasks, and denote critical milestones through a simple-to-use dialog box and dropdown menus. This flexibility means that while the template serves as the starting block, the resulting timeline can be as simple or detailed as needed, creating a personalized and effective project management tool.
When well-implemented, the use of Excel’s premade timeline templates not only aids in managing a project’s time effectively but also enhances overall productivity and communication.
Getting Started with Excel Project Timelines
Creating a project timeline in Excel is a pivotal step towards effective project management. A timeline provides an overview of the project’s timeframe, helping project managers and their teams visualize the sequence of tasks and important deadlines. Before you dive in, it’s essential to understand the project’s scope and determine the key milestones that must be represented on the timeline. Begin by gathering all necessary information about the project, including a list of tasks, their start and end dates, dependencies, and resources needed.
Setting up the Spreadsheet

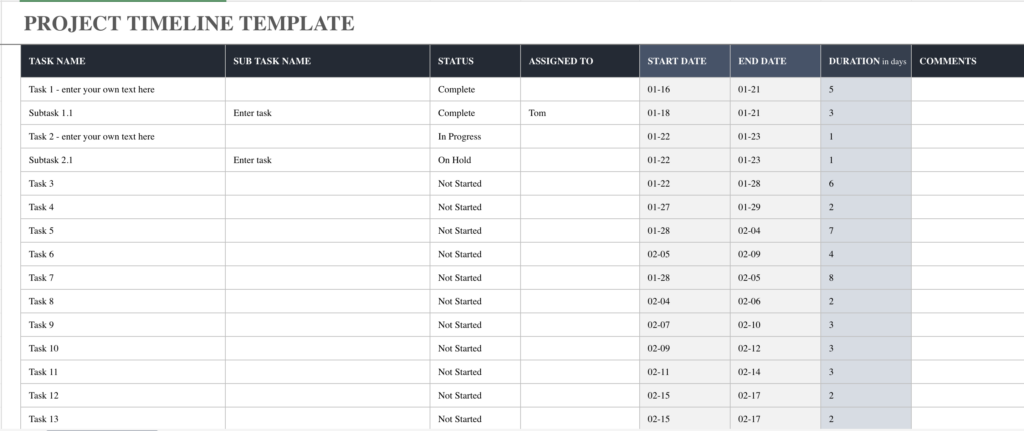
When you’re ready to set up your Excel spreadsheet for a project timeline, start with a fresh workbook. Label columns that will later hold your data—these typically include task names, start dates, end dates, durations, and possibly a status indicator for tracking project progress. For a basic timeline, focusing on tasks, start and end dates might suffice, but for more complex timelines, you might add more columns. Keep your rows and columns neatly organized to ensure your data is easily accessible.
Familiarizing Yourself with Excel Functions
Excel has a wide array of functions that are beneficial when making project timelines. Understanding how to use these functions can substantially improve your productivity when crafting your timeline. Key functions include ‘Fill Handle’ for quickly copying data or formulas, ‘Date’ functions for managing calendar dates, and ‘Conditional Formatting’ to automatically highlight key milestones or tasks at risk. Familiarize yourself with how to create a bar chart, which is critical for visualizing your timeline. Take advantage of Excel’s ‘Format Axis’ feature to adjust the timescale of your timeline, and learn how to use the drop-down menu to make your timeline more interactive.
Selecting the Right Project Timeline Template
If you don’t want to create a timeline from scratch, Excel offers a variety of premade project timeline templates that professional project managers often use. To find a suitable template, go to the File menu, click on ‘New’, and search for ‘timeline’. This will show you a selection of templates that range from simple linear timelines to detailed timelines with multiple layers. Choose a template that aligns best with the complexity of your project; a high-level project timeline is great for communicating general timelines to stakeholders, while a more detailed template is useful for managing intricate timelines that require frequent updates. Remember, even with a template, customization is key to tailor the timeline to your project’s specific needs.
Signup on Feedcoyote for Project Analysis Projects – Signup Now
Remember that a clear and beautiful timeline can make all the difference in ensuring your project’s success. It’s not only a tool for planning and tracking but also a means to communicate with your project team and stakeholders effectively. Excel’s capabilities, when utilized fully, make it a potent ally in project management. Whether you opt for a simple timeline bar or a complex chart, the clarity and overview provided by a well-constructed timeline are invaluable for any project manager.
Customizing Your Project Timeline
A project timeline must be tailored to encapsulate the specific details and nuances of your project. With Excel, you have the option to customize the spreadsheet’s appearance and functionality. Begin by adjusting column width and row height to improve readability. Consider grouping tasks into phases or categories to give a clearer structure using the “Group” feature in Excel. Use the ‘Merge & Center’ feature for headings to establish clear divisions within your timeline layout. Additionally, set up conditional formatting to automatically update the visual elements of your timeline based on changes in data. This ensures that the timeline remains dynamic, reflecting the real-time project progress.
Adding Tasks and Dates
To effectively track your project progress, it’s essential to add all relevant tasks and their corresponding dates into your timeline. Use the columns you’ve set up in the spreadsheet to enter each task name along with its start date and end date. By selecting the cells containing dates and employing the ‘Short Date’ format option, you maintain consistency in how dates are displayed. This step provides a foundational structure for your timeline, paving the way for more intricate details like dependencies and milestones.
Managing Dependencies between Tasks
Dependencies are critical in project management, as they indicate the relationship between tasks. In Excel, you can manage task dependencies by creating a column specifically for this purpose—marking which tasks rely on the completion of others. For a visual representation, consider using arrows or lines to connect dependent tasks. You could also utilize Excel’s ‘Comments’ feature (accessible from the right-click dialog box) to add notes explaining the nature of these dependencies.
Labeling and Color-Coding Tasks
Labeling and color-coding tasks can significantly enhance the comprehensibility of your project timeline. Use Excel’s ‘Font’ and ‘Fill’ options to distinguish different types of tasks or project phases through text styles and background colors. Creating a key or legend within your spreadsheet can help project team members quickly identify the status and types of tasks—ongoing, delayed, completed, etc. This visual coding system aids in scanning the timeline for information at a glance.
Including Milestones and Critical Events
Milestones and critical events act as checkpoints that mark significant achievements or deadlines in the project timeline. To integrate these, insert additional rows or utilize Excel’s ‘Shapes’ feature to add icons that stand out from regular tasks. Apply a different color or a specific design to these markers for instant recognition. Additionally, by right-clicking on your timeline chart, use the ‘Add Data Point’ option to ensure these events are reflected in timeline graphics or bar charts. Don’t forget to also apply the ‘Format Axis’ feature to appropriately space out these milestones on the visual timeline.


